Torchlight Enchanting Guide
Enchanting Guide
By carefully utilizing the various enchanters, a player can turn their gear into overpowered doom-wear - significantly improving a character's ability to squish the legions of the Netherim. This is not an operation for the impatient, nor for those incapable of pre-planning. But for those willing to think incrementally, prepare, and take advantage of opportunities, the rewards can be near god-like power.
• Acquiring Your Gear
• Socketing
• Enchanters and Locations
• Some Tips to Remember
• Notable Equipment Powers
• Enchantment Variance
• (i)Levels By Area
The key is mindset - have a plan, think flexibly, and be ready to execute when the chance presents itself.
Initial Steps:
 The first step is to select the exact suit of gear, (down to the skulls), you desire for end-game play. Plan around the skills and classes you enjoy fighting with, or, simple cosmetics. The truth is, most pieces of non-weapon gear above level 55 are suitable for end-game play, although the higher level equipment will gain far stronger powers and can accept superior socketables.
This does not hold true for weapons, as many skills are based on your weapon DPS (Damage Per Second) and DPH (Damage Per Hit). Only a few caster and summon builds find low level weapons useful in the end-game. Be cautious - many of the "magic" spells take into account your weapon's actual damage.
If you are confused or uncertain what gear will enhance your particular build the most, try the following resources:
- Runic Torchlight II Class Forums
- Game Faqs Torchlight II Forums
- Runic Games Fansite
Other players or existing threads in these locations can be very helpful in determining effective sets, stand-alone pieces, and socketables for your particular character.
For planning your equipment, socketables, and enchanting costs, the following resources are particularly efficacious:
- Enchanting Cost Calculator
- Torchlight Armory
Acquiring Your Gear
Now that you have a "plan of attack" it's time to start farming. This is easier than it sounds, thanks to how items generate in Torchlight II, Gambling mechanics, and the illustrious Vendor Boon.
Rare Equipment:
If your end-game set is "rare" then you need to search equipment vendors found on levels near the (i)level, (item level), of your desired suit. The merchant's inventory resets after a few trips to various dungeons, or after enough time has passed. Additionally, you can "force" them to change their inventory by joining other people's games, or creating LAN games and re-rolling your world. Buy any and every set piece you see of the desired suit - even if they are inferior to the ones you intend to wear.
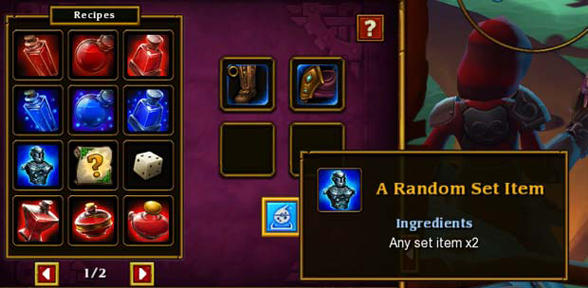
In addition to purchasing the desired set pieces, buy any other set pieces of similar levels. Why? Simple: Transmutation. You can use the Transmuter to turn two "rare" set pieces into one random rare of the same average level. By doing this with all of the "inferior" and "near level" set pieces, you can, over the span of several game sessions, capture a solid collection of "ROG," (Random Object Generation), gear with near maximum statistics, or statistics that play to your character's strengths, such as cast speed, hit points, attributes, or % boosts to minions.
Finally, remember that Vendor Boon will also generate rares EQUAL TO THE AREA LEVEL IN WHICH HE IS SUMMONED ON. Abuse this. Hard. You can nearly guarantee that a good selection of set items in the level range you are hunting will be available for sale.
Unique Equipment:
If you are selecting unique equipment, then your quest is a bit easier. The powers are "set" and you can cut out the "re-rolling" process that is required to craft a truly outstanding rare set. Additionally, unique items start with one socket, which saves valuable gold otherwise donated to Jurick's retirement fund.
Another factor making your life far more simple, (providing you remain within a specific level range), is that you can expect to encounter uniques as drops from bosses or chests. This is especially easy to control thanks to the Mapworks and the restricted (i)levels of most normal mode areas. You know before-hand what an area is capable of generating, and can contain the treasure hunt to places guaranteed to drop the baubles you're after.
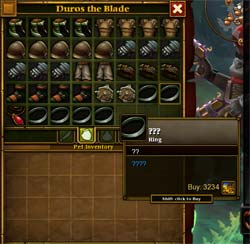 Don't neglect gambling - this will be your primary source of belts and jewelry. By keeping track of the general area levels - including towns - you can very easily get your jewelry and belts by gambling within a specific level range. For the (i)level 100 Sets and (i)level 90+ Unique items, New Game+ (or higher) offers better chances for success. (The Mapworks Gambling robot can spawn anything from levels 45-100, but due to the size of the item pool, getting a specific object is going to be dicey). Jewelry is typically the big sticking point with unique gear.
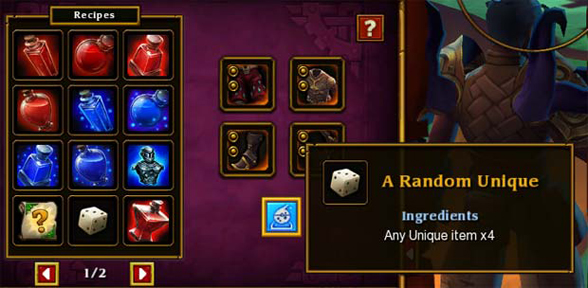
Transmuting is also a great option, as both the two set item and four unique item transmutations can grant additional shots as particular pieces.
Finally, everything we said above about Boon holds true here - in fact, with the exception of belts and jewelry, Boon makes getting unique sets trivial if he's deployed in a proper local. Just be sure to bring your Mid-evil VISA - he ain't cheap. (For the level 100 sets, summon boon in a level 105 Mapworks map for good results).
Boon Tip: If you town-portal away, or leave the zone before Boon walks fully off the screen, (and vanishes), he will still BE there when you come back later, providing you don't regenerate the level.
Socketing:
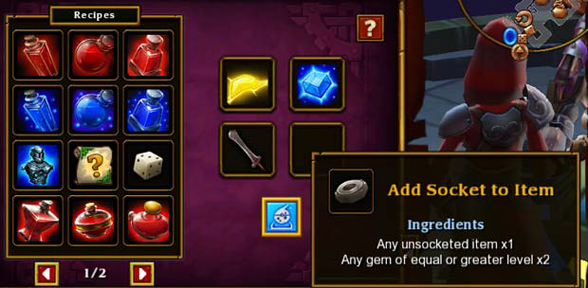
One of the most potent magical enchantments is an item "socket." Every piece of gear can have a set number of these sockets, and the player is free to choose what ember chunks, skulls, eyeballs, or other detritus they'd care to toss in them. These choices will have a tremendous impact on how any character performs, and many socketables enhance equipment with unique powers.
Max Socket's Available:
- Normal Item: 3 Sockets
- Magic Item: 3 Sockets
- Rare Item: 4 Sockets
- Unique Item: 2 Sockets*
(*Asphyx set exempted)
- Legendary Item: 2 Sockets
For Rare, Magical and Normal pieces, try, whenever possible, to use the Transmuter for the initial socket - this saves you money over the long run, and gold is going to be your most valuable asset. Two pieces of ember, (one of which needs to be equal to, or greater than, the level of the item to be socketed), will add one socket to any equipment - should it lack one.
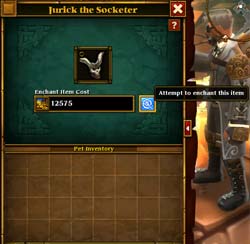
For adding a second socket, you will need Jurick the Socketer. He is the only way to punch a second hole in your equipment, and he will charge you through the nose for his services. Please note that items with more than two sockets must "randomly generate" or contain the three (or more) sockets as part of it's innate bonus - even Jurick cannot add more than two sockets to an object.
Enchanters and Locations
 While the towns always have a few enchanters on-hand, for the most part their services are lack-luster. With the Exceptions of Greezo, Vaneez and Garbahd, the enchanters with set locations are rarely worth using. Which means you'll need to start hunting! Fortunately, there are several locations that boast very high chances of an enchanter appearing, such as "Crow's Pass" in act I and the "Rotted Path" in act III. In fact, these areas will frequently generate more than one enchanter, making them prime search locations.
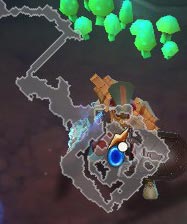
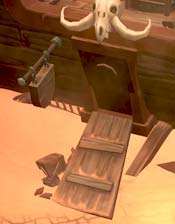
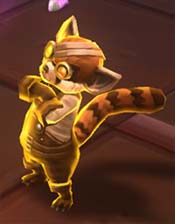
The Mapworks scrolls Frostshorn Caverns and Shadowy Grotto have a high frequency of spawning an enchanter. Search for the "chunk" pictured to the left.
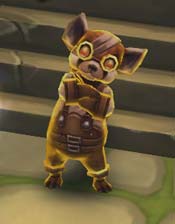
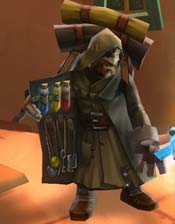
Torchlight II Enchanters
 Enchanter Malo
Specialty: General Enchants Number of Enchants: 1 Location: Estherian Enclave Spawn Chance: Always  Rufio the Enchanter
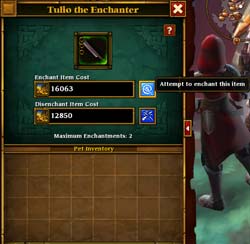
Specialty: General Enchants Number of Enchants: 2 Location: Zeryphesh Spawn Chance: Always  Tulio the Enchanter
Specialty: General Enchants Number of Enchants: 2 Location: Imperial Camp Spawn Chance: Always  Shemp the Enchanter
Specialty: General Enchants Number of Enchants: 2 Location: Minehead Spawn Chance: Always  Greezo the Enchanter
 Specialty: General Enchants Number of Enchants: 3 Location: The Mapworks Spawn Chance: Always  Garbahd the Enchanter
 Specialty: Effects Enchants Number of Enchants: 2 Location: Elemental Oasis Spawn Chance: Always |
 Vaneez the Poisoner
Specialty: Poison Enchants Number of Enchants: 2 Location: Ship Graveyard Spawn Chance: 25%  Farquez the Assassin
Specialty: Poison Enchants Number of Enchants: 3 Location: Random Spawn Chance: 10%  Mooritz of the Desert
 Specialty: Fire Enchants Number of Enchants: 3 Location: Random Spawn Chance: 10% 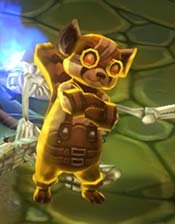 Panosh of the North
Specialty: Cold Enchants Number of Enchants: 3 Location: Random Spawn Chance: 10%  Telsor of the Storm
Specialty: Electric Enchants Number of Enchants: 3 Location: Random Spawn Chance: 10% 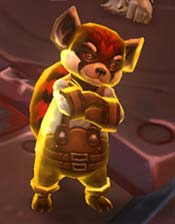 Filip the Lucky
 Specialty: Luck Enchants Number of Enchants: 3 Location: Random Spawn Chance: 10% |
 Borris the Stout
 Specialty: Stat Enchants Number of Enchants: 3 Location: Random Spawn Chance: 10% 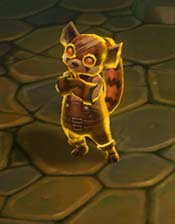 Jurick the Socketer
 Specialty: Socket Enchants Number of Enchants: 1-2 Location: Random Spawn Chance: 5% 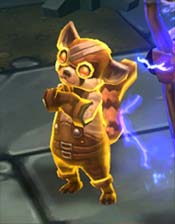 Fondo the Master
Specialty: General Enchants Number of Enchants: 3 Location: Random Spawn Chance: 33% 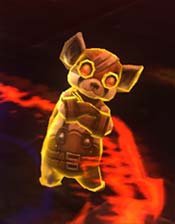 Karkozi the All-Powerful
 Specialty: General Enchants Number of Enchants: 4 Location: Random Spawn Chance: 4% |
Some Tips to Remember:
• If you are truly interested in maximizing a suit, farm, trade, and gamble two to three copies of each piece of gear you plan to wear end-game. In this manner, you can continuously re-enchant the "spare" piece(s), switching out articles that over time exceed the "alpha" gear. Eventually, you will acquire a near perfect set of stat enchants.
• Karkozi the All-Powerful does NOT charge for dis-enchants. This is a key money saver when a player sets out to build their end-game equipment.
• You can make trips back to town in between enchanting sessions to unload inventory - so long as you leave the level before the enchanter "fades away" you can return and quickly catch him to continue enchanting.
• The game saves maps - this includes specific enchanters. Over time, the level will regenerate it's MOBs - enchanters included. Abuse this like a meth junkie.
• Borris and Filip have a one-in-twenty chance of imbuing an item with a "critical enchant." This means the magical bonus is almost doubly strong - which adds up FAST on high level gear. Of particular note, Filip can critical enchant % to experience gain, and all of Borris's stat bonuses are stellar. Garbahd is a special case - ALL of his enchantments crit.
• If you plan on using a few non-attribute enchants, save the first enchant for whatever modifiers you're after. This lets you cheaply dis-enchant and re-enchant using Karkozi until getting any specific mod. This will save you MILLIONS in the long run, and hours of your life. It will also allow you to plan out your equipment to optimize your character's performance. Slow casting Engineer? Then make sure your gloves, helm, and body have % cast speed. Glass cannon Outlander? Your Belt, Rings, and Necklace can get very high + hit point bonuses to help compensate.
• When looking for specific magical powers, or when using Borris/Filip, keep re-rolling the first modifier until they cast a critical enchantment or you get the specific power needed. (You will know a critical enchantment happens when the screen flashes brightly). Since you can easily "control" your first enchant, always makes sure it's exactly what you want, or a crit.
• The potency of the enchantments is based on the item level. This is most noticeable with Borris the Stout, and you should take this into account when choosing end-game equipment. Level 55+ is strongly recommended, unless the set has some of the more "broken" mods, such as % life steal, % mana steal, or insane casting speed.
• The passive magic spell Barter I-VI will significantly reduce the cost of enchanting your gear. Hold onto every copy of this spell you find and store them in your Shared Stash. They are priceless - some would argue essential - to creating a truly epic suit of end-game gear.
• Store up "high value" stackable items to transfer money from character to character using the Shared Stash. Good "high value" items are as follows:
- Any Rejuvenation Potion
- Dynamite
- Resistance Potions
- Ultimate Healing Potions
- Ultimate Mana Potions
- Stacks of Goldfish
- Useless Level VI Spells
(The best items are the ones you find, rather than ones purchased, since you loose money on the "buy" and "sell" part of the transaction. Rejuvenation Potion Stacks tend to deliver the most bang for the inventory space).
• Be ready to use any character at any time to enchant! You never know when you are going to run across a needed enchanter in your travels, and thus, it's imperative to keep a good collection of Barter I-VI scrolls and quickly transferable wealth in your shared stash. Be prepared so you can take full advantage of running across Karkozi in your level 13 savage.
Notable Equipment Powers:
All enchantments are not created equal. Some are so insignificant as to be near worthless, while others can morph a character int a virtual demigod. For example, integer weapon damage anywhere but ON the weapon, or % based enhanced weapon damage accomplishes almost nothing in an end-game situation. (It's added to damage calculation, which makes it all but useless). By contrast, % based elemental damage is very strong for a caster that uses skill-based magical attacks.
What the above paragraph illustrates is that you need to carefully consider what enchants will work best with your chosen class and skill-set. % Elemental damage on a dual claw Berzerker specialized in auto-attacking will not help you as much as an Embermage built around Prismatic Bolt. You really will need to lean a bit about how your chosen character operates, and that is well beyond the scope of this article. However, there are still certain equipment modifiers that stand out, and many of those are collected in the lists below:
• % Full Heal on Kill (Necklace) - Best Provided By: Garbahd
• % Full Heal on Hit by Enemy (Necklace) - Best Provided By: Karkozi
• % Pet and minion Damage (Gloves, Belt, Armor, Legs) - Best Provided By: Karkozi
• % Run Speed (Boots, Legs) - Best Provided By: Garbahd
• % Dodge Chance (Armor) - Best Provided By: Karkozi
• % Cast Speed (Gloves, Helm, Armor) - Best Provided By: Karkozi
• % Shield Block (Shields) - Best Provided By: Karkozi
• % Magic Find (All) - Best Provided By: Filip
• % Gold Find (All) - Best Provided By: Filip
• % Bonus Experience (All) - Best Provided By: Filip
• + Hit Points (All, Best on Belt, Necklace, Rings) - Best Provided By: Karkozi
• + Focus (All) - Best Provided By: Borris
• + Strength (All) - Best Provided By: Borris
• + Dexterity (All) - Best Provided By: Borris
• + Dexterity (All) - Best Provided By: Borris
Weapons:
• % Attack Speed (All) - Best Provided By: Karkozi
• % Chance to Execute (All) - Best Provided By: Filip
• % Critical Hit (All) - Best Provided By: Filip
• % Bonus to Critical Damage (All) - Best Provided By: Filip
• % Stun (All) - Best Provided By: Karkozi
• % Full Heal on Kill (All) - Best Provided By: Karkozi
• % Weapon Damage to Secondary Targets (Non-claws) - Best Provided By: Karkozi
• % Casting Speed (Wands, Staves) - Best Provided By: Karkozi
• % Chance to Freeze (All) - Best Provided By: Panosh
• % Chance to Burn (All) - Best Provided By: Mooritz
• % Chance to Shock (All) - Best Provided By: Telsor
• % Chance to Poison (All) - Best Provided By: Vaneez/Farquez
• + Physical Damage (All) - Best Provided By: Karkozi
• + Ice Damage* (All) - Best Provided By: Panosh
• + Focus (All) - Best Provided By: Borris
• + Strength (All) - Best Provided By: Borris
• + Dexterity (All) - Best Provided By: Borris
• + Dexterity (All) - Best Provided By: Borris
*Particularly useful to Berserkers.
Some of the most globally useful enchants are % Cast Speed, + Hit Points, and any of Borris's Attribute Enchants. (And ONLY Borris). Many other enchants require a bit more planning, but if properly combined with the right uniques and socketables you can, for example, gain a DISTRESSINGLY high chance to recover all of your life on being HIT. That's correct, you have found the legendary "healing shiv." (And really, that's on the mild end of what you can accomplish when really plumbing the meta-game).
Enchantment Variance:
While most magical powers are have a set value, which never changes, some enchantments have a variance. This can add another level of difficulty if you are, for instance, trying to make an insanely damaging weapon. Listed below are the properties that will vary in potentcy with each casting:
• + to Armor• + to Stats
• + to Physical Damage
• + to Mana
• + to Hit Points
• + to Elemental Damage
• + to Elemental Armor
• - Armor Per Hit
• X Damage over 5 Seconds
• - to Item Stat Requirements
• % to Immobolize Target
• % to All Damage
• % to Elemental Damage
• X Health Recovery/Second
(i)Levels By Area:
Below is a list of the various areas, and their (i)levels. This information will help you determine what items will generate in a given area, which socketables can drop, and what vendor Boon will offer when summoned.
Town: Estherian Enclave (Lvl: 15-27)
Zone: Beginner Area (Lvl: 1-2)
Dungeons & Passes:
- Echo Pass(Lvl: 1-2)
Zone: Temple Steppes (Lvl: 6-8)
Dungeons & Passes:
- Path of the Honored Dead (Lvl: 3-4)
- Corrupted Crypt (Lvl: 4-5)
- Bone Gallery (Lvl: 8-10)
- Plunder Cove (Lvl: 8-11)
- Wellspring Tstrongple (Lvl: 10-12)
Zone: Frosted Hills (Lvl: 14-16)
Dungeons & Passes:
- Crows' Pass (Lvl: 12-13)
- Widow's Veil (Lvl: 13-14)
- Whispering Cave (Lvl: 17)
- Emberscratch Mines (Lvl: 16-17)
- Slavers' Stockade (Lvl: 16-18)
- Icedeep Caverns (Lvl: 16-18)
- Norsk Leiren (Lvl: 17-20)
- Watchweald Tstrongple (Lvl: 18-20)
Act III:
Town: Imperial Camp (Lvl: 36-49)
Zone Areas: Grunnheim (Lvl: 36-52)
Dungeons & Passes:
- The Rotted path (Lvl: 36-37)
- Fungal Caves (Lvl: 36-37)
- Blightbogs (Lvl: 37-39)
- Abandoned Sawmill (Lvl: 38-40)
- Rivenskull Gorge (Lvl: 41-42)
- Vyrax's Tower (Lvl: 44-46)
Zone: Sundered Battlefield (Lvl: 42-43)
Dungeons & Passes:
- Forgotten Halls (Lvl: 42-45)
- Notch's Mine (Lvl: 43-45)
- Cacklespit's Realm (Lvl: 43-45)
- Elemental Oasis (Lvl: 45)
- Emberworks (Lvl: 44-46)
- Lair of the Sisters (Lvl: 45-52)
Town: Zeryphesh (Lvl: 27-40)
Zone: Ossean Wastes (Lvl: 21-23)
Dungeons & Passes:
- Stygian Aerie (Lvl: 22-26)
- Shadowy Crevasse (Lvl: 22-25)
- Tarroch's Rift (Lvl: 22-25)
- Tower of the Moon (Lvl: 22-25)
- Forsaken Vaults (Lvl: 23-26)
- Empty Quarter (Lvl: 29-30)
- Undercurrents (Lvl: 30-31)
Zone: Salt Barrens (Lvl: 30-32)
Dungeons & Passes:
- Swarm Point (Lvl: 31-33)
- Korari Cave (Lvl: 31-34)
- Ancient Vaults of Chaos (Lvl: 33-35)
- Vault of Souls: (Lvl: 31-34)
- Brood Hive (Lvl: 32-33)
- Luminous Arena (Lvl: 33-34)
- Haunted Quarter (Lvl: 33-35)
- Witherways (Lvl: 34-35)
Act IV:
Town: Minehead (Lvl: 44-58)
Zone: Broken Mines (Lvl: 47-51)
Dungeons & Passes:
- The Broken Mines 1-5 (Lvl: 47-50)
- The Broken Mines 6-7 (Lvl: 48-51)
Town: Mapworks Hub (Lvl: 60-105)
Zone: Mapworks Portals (Lvl: 48-105)
Dungeons & Passes:
• Dragon Fortress
- Dragon Citadel (Lvl: 48-105)
- Dragon Keep (Lvl: 48-105)
- Dragon h3hold (Lvl: 48-105)
- Wyvern Citadel (Lvl: 48-105)
- Wyvern h3hold (Lvl: 48-105)
• Dwarven Factory
- Deserted Foundry (Lvl: 48-105)
- Deserted Labs (Lvl: 48-105)
- Deserted Workshop (Lvl: 48-105)
- Forgotten Factory (Lvl: 48-105)
• Ezrohir Chambers
- Ezohir Commons (Lvl: 48-105)
- Ezrohir Halls (Lvl: 48-105)
- Ezrohir Treasure (Lvl: 48-105)
- Ransacked Vault (Lvl: 48-105)
• Fungus Caves
- Abyssal Fissure (Lvl: 48-105)
- Abyssal Grotto (Lvl: 48-105)
- Abyssal Pit (Lvl: 48-105)
- Shadowy Caves (Lvl: 48-105)
- Shadowy Grotto (Lvl: 48-105)
• Ice Caves
- Frostbitten Chasm (Lvl: 48-105)
- Frostshorn Caverns (Lvl: 48-105)
- Frostshorn Ravine (Lvl: 48-105)
• Estherian Temples
- Blighted Hollow (Lvl: 48-105)
- Blighted Retreat (Lvl: 48-105)
- Blighted Sanctum (Lvl: 48-105)
- Desolate Chantry (Lvl: 48-105)
- Desolate Sanctuary (Lvl: 48-105)
- Desolate Shrine (Lvl: 48-105)
- Desolate Tstrongple (Lvl: 48-105)
- Infected Depths (Lvl: 48-105)
- Ruined Tstrongple (Lvl: 48-105)
• Crypts
- Bloody Boneyard (Lvl: 48-105)
- Bloody Crypt (Lvl: 48-105)
- Bloody Mortuary (Lvl: 48-105)
- Bloody Vault (Lvl: 48-105)
- Cursed Mausoleum (Lvl: 48-105)
- Defiled Burrow (Lvl: 48-105)
- Defiled Cstrongetery (Lvl: 48-105)
- Desecrated Burrow (Lvl: 48-105)
- Desecrated Graves (Lvl: 48-105)
- Ghastly Mortuary (Lvl: 48-105)
- Infernal Catacombs (Lvl: 48-105)
- Infernal Mausoleum (Lvl: 48-105)
- Infernal Necropolis (Lvl: 48-105)
- Infernal Tombs (Lvl: 48-105)
* Note: The Dungeon levels in The Mapworks are based on the level of map you select.
The League of Outlaw Bloggers
‣ 12 Round Blog‣ Alt-Market
‣ American Partisan
‣ Anti-Idiotarian Rottweiler
‣ Ann Barnhardt
‣ Captain Capitalism
‣ Chateau Heartiste
‣ Cold Fury
‣ Daily Pundit
‣ Everything Yet Nothing
‣ Kiwi Farms
‣ Knuckle-Draggin' M.L.A.
‣ L.O. Outlaw Bloggers
‣ Liberty's Torch
‣ Men of the West
‣ NC Renegades
‣ Raconteur Report
‣ Sipsey Street Irregulars
‣ Sum. Patriot, Win. Soldier
‣ The Burning Platform
‣ The Captain's Journal
‣ The Intrepid Reporter
‣ The Market Ticker
‣ The Most Violent Element
‣ The Saker
‣ The Z Blog
‣ Western Rifle Shooters
‣ Woodpile Report
Comedy, Satire & Comics
‣ All the Tropes‣ Bounding Into Comics
‣ Day By Day
‣ Stilton's Place
‣ Stone Toss
‣ The Babylon Bee
‣ The People's Cube
Alt-Tech
‣ Bit-Chute‣ The Brave Browser
‣ Yandex Search Engine
‣ Gab
‣ Infogalactic
‣ Minds
‣ ProtonMail
‣ SubscribeStar
‣ Telegram